For a car that looks as exciting as the DeLorean, the instrument cluster is a bit underwhelming. I mean there's nothing wrong with it, but it didn't break any new ground on styling or function. With my goal to make a "Knight Rider DeLorean", I of course need to improve this a bit.
My impression of the Knight Rider dashboard when I was 8 years old was that it was the coolest technological thing in existence. Looking at it again 20 years later, it's still cool, but I realize it uses up a lot of space for the information it conveys, and it's very limited in what it can show because of the hardware LEDs. Also, it curves around the driver which walls off the passenger a bit. My day job at the time was to integrate an embedded linux computer and screen into fitness products, and so I decided a good alternative was to integrate a screen into the existing dashboard, or at least something that resembled the original dashboard.
The DeLorean has a downward sloping dashboard with a "Binnacle" which sits on top the dash and houses the instrument cluster. The binnacle has an opening roughly 16" by 4", and its about 11" deep, though a diagonal portion of that 16x4x11 space is cut off by the structure of the dashboard beneath it. While I could get 3 small screens to fill the 16x4 opening, I would end up with black bars in inconvenient places, and I would need 3 display drivers, which isn't helpful when I want to do the rendering in software on a Linux PC.
The Search for a 16x4 Display
The binnacle opening is about 16" x 4", and ideally I wanted to fill the whole thing with a single screen. It has about a half inch overhang around the border, so the display could be as large as 17" x 5" if needed. I did some searching for companies who make custom displays, but didn't find anything in the 16x4 range.
My next idea was a little crazy... An LCD screen is a field of liquid crystal cells accessed by vertical conductors from the top and horizontal conductors from one side. If you cut off a portion of the screen at the ends of those conductors, wouldn't the earlier pixels still work? I turned to the Internet for help:
bit-tech.net forums: Is it possible to cut a TFT panel?
And thanks to Smilodon from Norway, I found out that it was indeed possible!
Near the end of that forum thread, user Weasel found a link for me to a company who does LCD cutting. Sadly, nobody at the company responded to my emails asking about making a one-off prototype (and I probably couldnt afford it anyway). So, highly inspired, I got a LCD panel out of a dead TV from my cousin (it would no longer tune channels, but I could see static to know whether it was still alive) and went over to my friend Lee's house to try his dremel and tile saw.
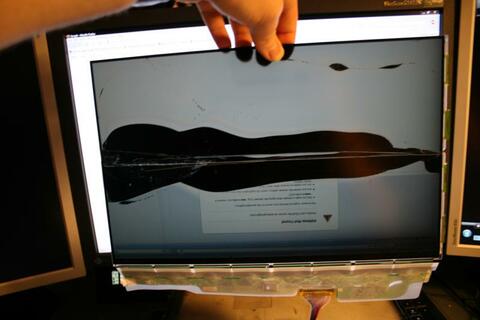
Our plan was to cut off 1-inch strips of the display from bottom to top, to give us lots of cutting practice. The plan was partly successful, but the main problem was that no matter which tool we used or what speed it spun or what speed we moved it through the screen, the vibrations would separate the two pieces of glass and break all the liquid crystal cells near the cut. By the final cut the best I'd managed was a 2" wave of destruction at the edge. In order to hide the dead pixels behind the edge of the DeLorean binnacle I'd need just under 1".
We took some video of the attempts, but they have been misplaced. I'll post them when we find them.
While I'm sure I could eventually get it, I think it would have taken an unfortunate number of sacrificial panels to get it right. So, I started moving on to other ideas of building my own binnacle to house a larger monitor.
Cheating With Mirrors
The layout of the DeLorean driver seat has you laying backward, like a lawn chair. (It's very comfortable!) This leaves you looking right across the top of the binnacle as you drive, and so any increase in height of the binnacle would start blocking the view of the road. There's also not any usable space underneath the binnacle due to the structure of the dashboard and pedal box. But, I came up with the idea of turning the monitor face-down and looking at it through a mirror! The mirror wouldn't need to show the whole monitor, so I could put it at whatever angle I needed for proper viewing, and then render my graphics onto the visible area of the monitor.
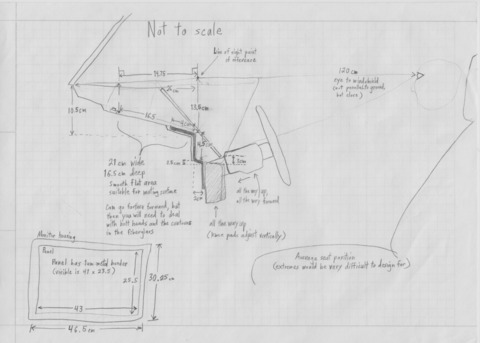
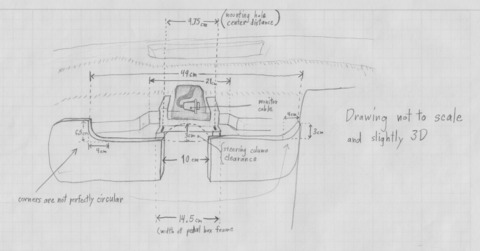
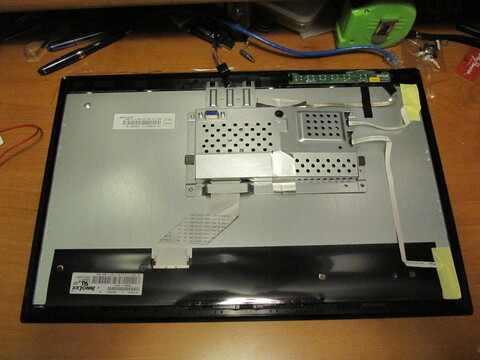
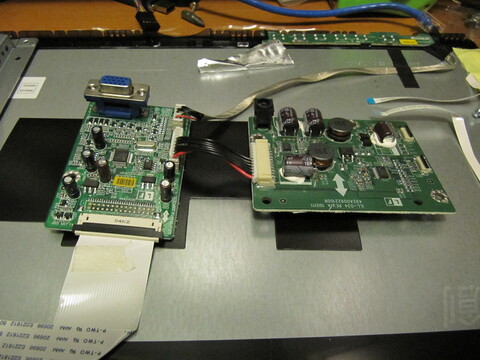
Since all I needed was a monitor of the right width, I picked a common 18" widescreen flat panel which were extremely common in 2011 and floated around the $100 range. Nothing terribly special, and easy to replace if I destroyed it. The first one took 110v, but had a nice division on the circuit board between the power supply and the video components, so I was able to cut some traces and feed it 12V directly. (later in 2012, I damaged this one such that it wouldn't display the color green anymore, and the replacement I found took 12V direct from an external power brick, and had smaller circuit boards too. But even later in 2014 when I burned that one out, I discovered that nobody makes that monitor anymore and I had to repair the circuit board!)
Here's the second monitor from 2012, which is an LG Flatron:
Wireframe Prototype
I started by mocking up my design with a wireframe, literally. I'd discovered this trick earlier where I just bend 16 gauge galvanized steel wire into the desired shape, then weld the points together with a spot welder. It's a great way to prototype things. I removed the dashboard and binnacle, took a bunch of measurements, and then started bending wire:
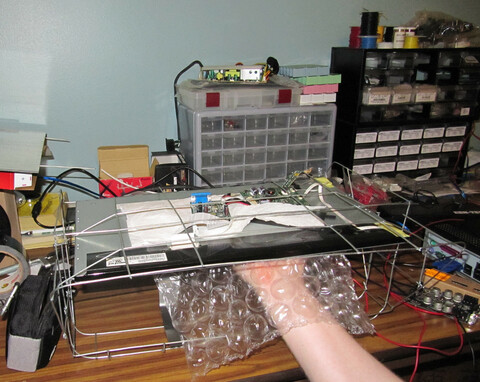
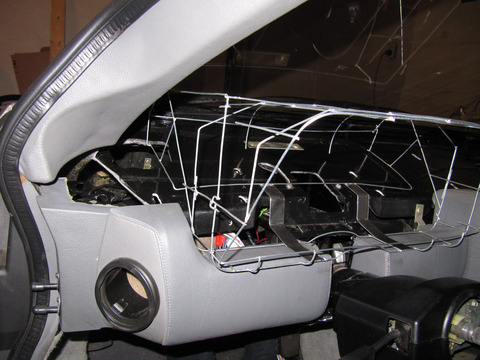
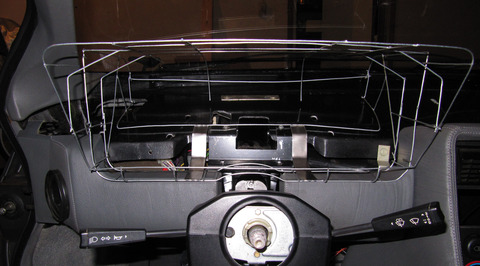
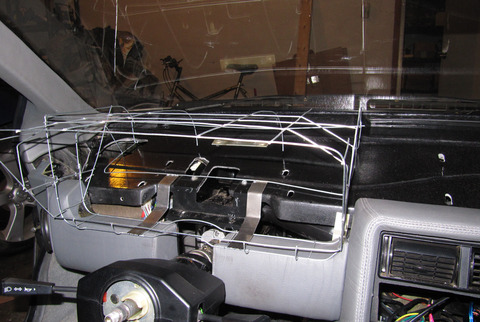
I started out with hard corners, but then evolved to a more rounded but still beveled look:
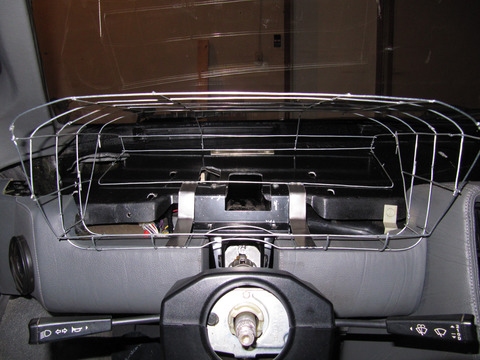
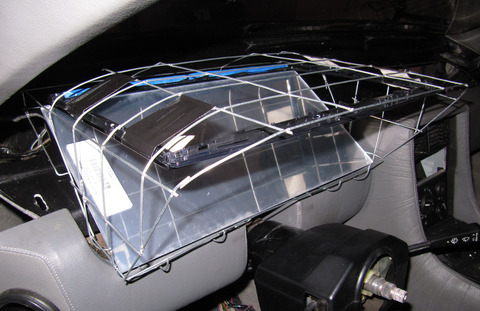
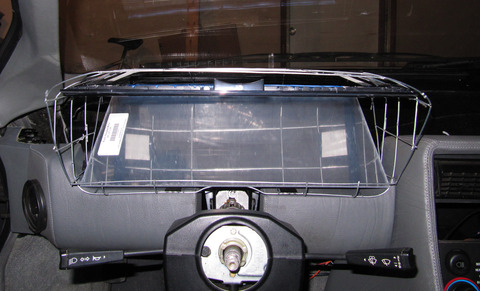
With the monitor and mirror installed, it looked like this:

I updated my software to be mostly usable, and drove it a little bit in this configuration, with duck tape holding it all together :-)
Expanding Foam
I have a decent track record of diving into things I've never done before and teaching myself enough to succeed at it.
Expanding foam is not one of these things.
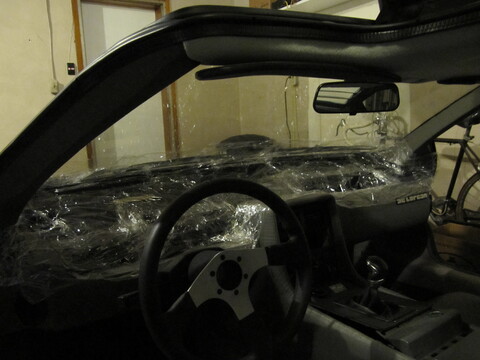
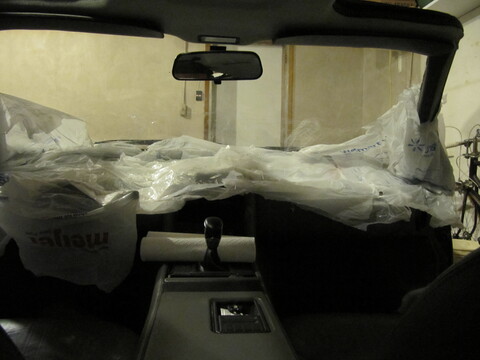
I watched some videos online and came up with the idea that I should just cover the dash mounting surface in expanding foam, then carve out the shape I want. The catch is that I didn't want to get foam all over the car, and I wanted to be able to remove it when I was done. I attempted this by covering the dash in plastic wrap, containing the area with plastic bags and tape, and then filling it with hardware store spray foam.
This completely failed. I expected the foam to be sticky, but it turned out to have some surface tension and slid right off the plastic wrap. It ended up in sort of a dashboard shape, but didn't fit the contours at all since the surface is sloped and there was nothing to hold it against the windshield.
Cincinnati State Industrial Design
While asking around for advice, Josh Haldeman (a fellow member of the Ohio DeLorean Club and industrial design instructor at Cincinnati State), suggested some of his students might be able to handle that for me, and make an exciting senior project in the process.He introduced me to David Brown, Bradley Clary, and Kevin Schiller, and I showed them what I had and where I was trying to go with it. They worked through the next few months carving a design from foam, building housings and brackets for the monitor and mirror, and designing graphics for the software. Meanwhile, Josh decided to go all-in on the presentation, and assembled an entire drivers section of a DeLorean from spare parts and leftover chunks of a wrecked DeLorean that he had. The end result was pretty amazing, wheeling an entire quarter of a DeLorean onto the stage for their capstone presentation, complete with software animations and accent lighting.
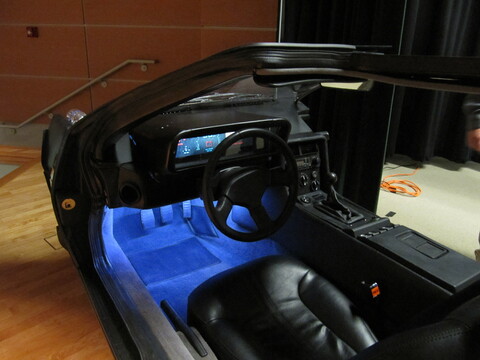
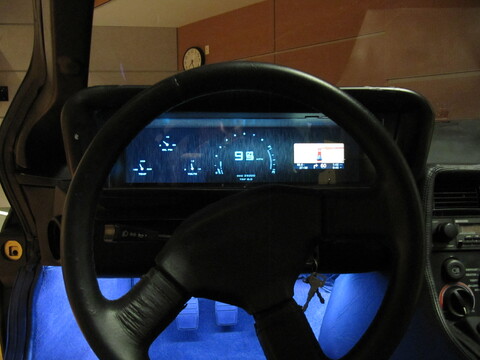
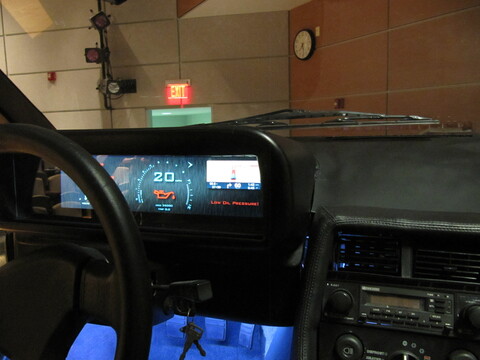
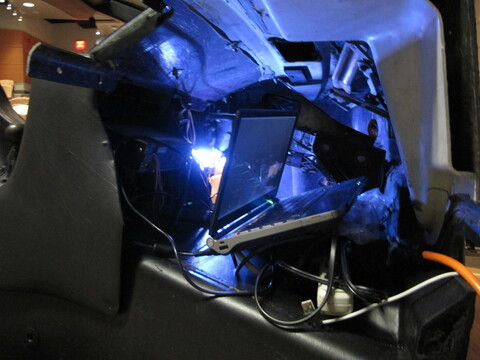
Afterward, though, there were still a few loose ends. Naturally everyone was in a rush to finish on time, and one of the missing pieces was the plan for how to affix the binnacle to the mounting surface of the car. The prototype also wan't matched well to the very unusual contours of the DeLorean dashboard. And on top of that, the foam was prone to nicks and scuffs, so the finished product needed a more durable surface material.
Custom Fiberglass
As I was working out how to mount their prototype, I started into a project to mold a mating surface to the dashboard frame using fiberglass. My dad joined in, and we covered the dashboard in painter's tape, and then began making a cast of the shape.
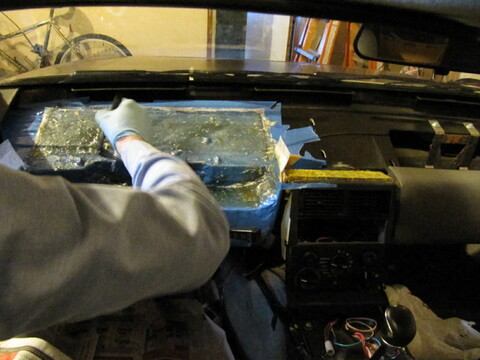
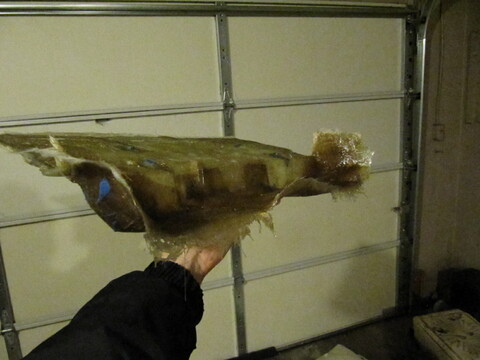
Then, we applied fiberglass to the back of that to create a replica of the original mounting surface. I had to add more fiberglass with some ridges to give it enough rigidity to hold it's shape under pressure.
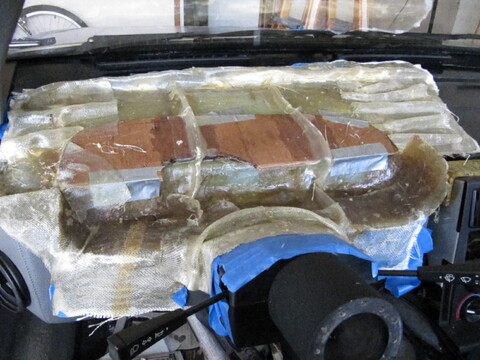
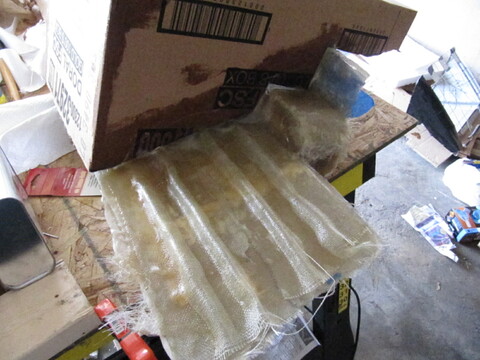
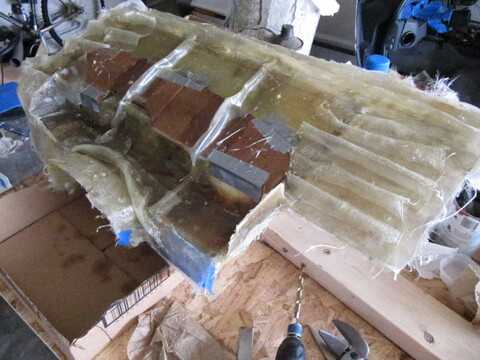
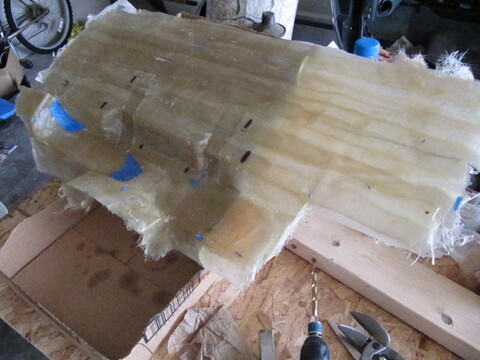
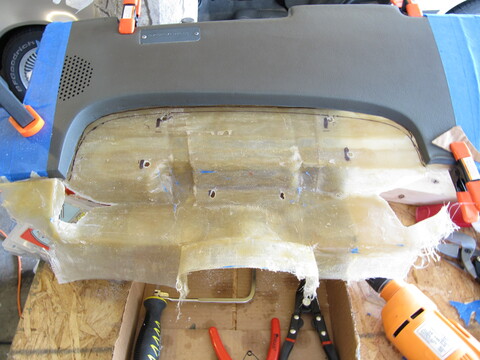
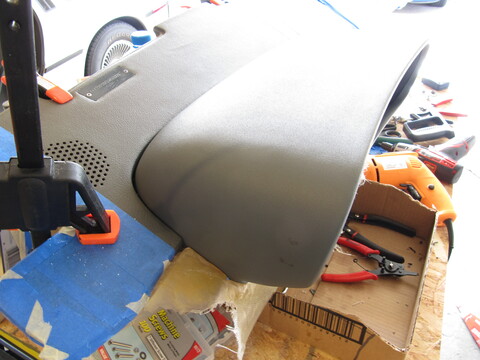
Since it seemed to be working pretty well, I decided to go ahead and build out the whole binnacle using fiberglass. I departed from the Cincinnati State design a bit in order to have a larger viewing area. Their design was beautiful for a car instrument cluster, but I was aiming for more of a mobile computer terminal look. I cut some foamboard with the outer shape I was looking for, and used contact paper to form a smooth inner curve.
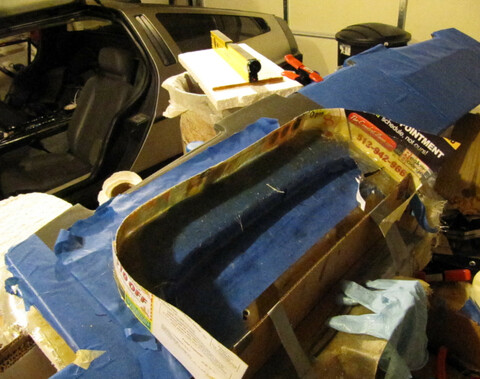
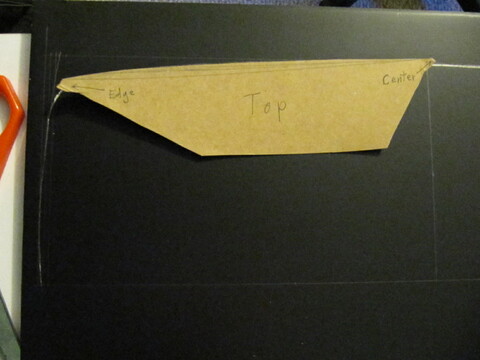
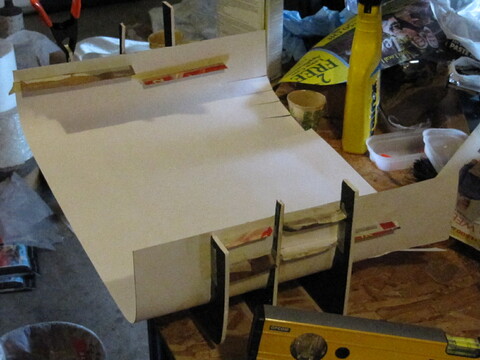
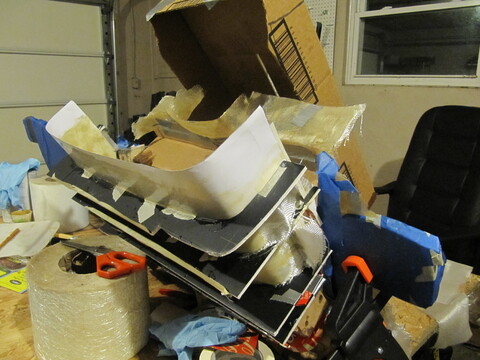
About that time my maker-y new girlfriend Jenn joined in on the project, and we finished out the upper half of the binnacle together. We also started on trying to make a fiberglass replica of the dashboard itself, though that was going to be a harder project. (the dashboard changes shape significantly when installed in the car, and fiberglass wouldn't bend quite the same way, nor did we have any chance of making a good cast that large without a better bench area)
In the end, getting the top and bottom together and a decent looking front face and sanding and painting was a hassle that drug out over two years.
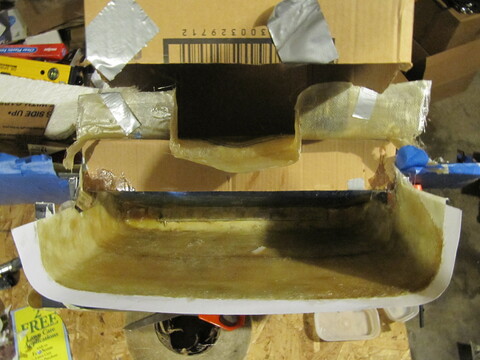
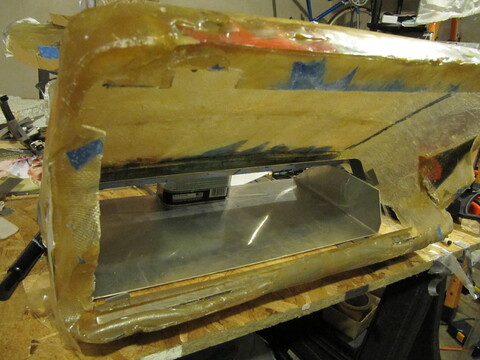
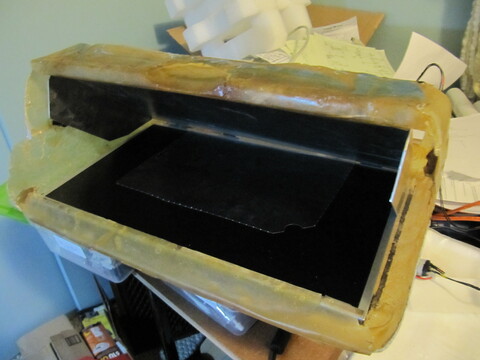
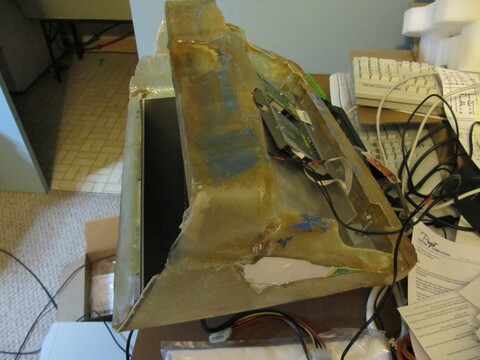
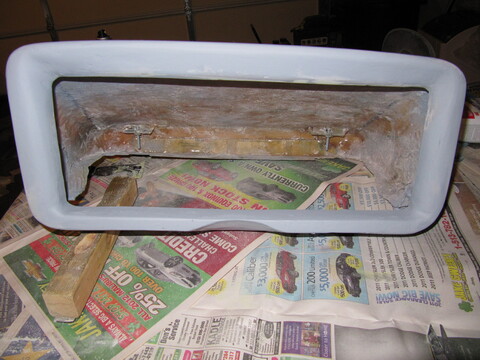
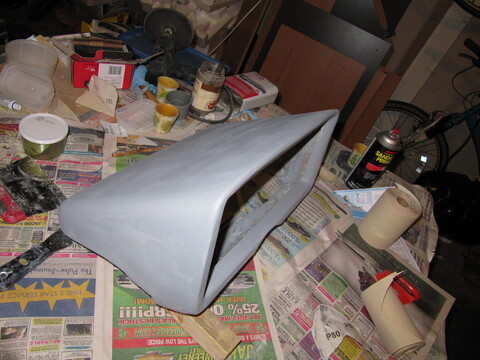
I finally got things installed and looking reasonably good in time for the 2014 DeLorean Car Show in Dayton Ohio, where the instrument cluster almost but didn't quite make its debut. In the rush to get it together I didn't complete the wiring, and then at the show when I tried to power it up I connected the wires backward and burned out both the computer and monitor. Luckily I was able to salvage them, and got it fully assembled and working in 2015.
Future Work
I can't say if I'll return to the physical side of the project any time soon, since it works well enough and there is so much software to work on, but one of the cool ideas I had was to mirror the dashboard so that the passenger has a computer terminal as well. Theirs could even have a fold-down keyboard. I think the symmetry would look really nice and contribute to the aircraft visual effect that makes the car so appealing. If I do attempt that, I'll probably give expanding foam another try, and completely remove the interior of the car so that I'm not so worried about spilling the foam. It would also help to use the correct foam product instead of experimenting with hardware store brands.
People often ask if I'm going to develop a kit so they can have digital dashes too. Currently, the construction process is out of my league. Even having done it once, it would probably take me at least four months of full time work to clone my project, which isn't a price I think anyone is willing to pay. 3D printing could make it faster, but none of the curves of the dashboard follow any mathematical pattern, so modeling it would be a pain, and it is larger than most hobbyist 3D printers. I would also need to improve the internal design before I'd feel comfortable selling it. The components are held together solidly, but it is extremely awkward to disassemble for repairs, and getting the bracket and bolts to line up while installing it is currently an hour long exercise in frustration.
However, there is a much more practical route for digital dashboards, now. Another Ohio Delorean Club member, Kevin Krinn, discovered some small ultra-wide screens on AliBaba that are used for subway car advertising, and which are almost the perfect size for the original DeLorean binnacle. If these continue to be available, it makes an easy upgrade to get a digital display, and then the rest is all about what software and computer you want to use. I'd be happy to sell a disk image and microcontroller package if there was enough interest, but the way things are going currently, each person has a different idea of what the software should do and what it should look like :-)