2023 Mar 11
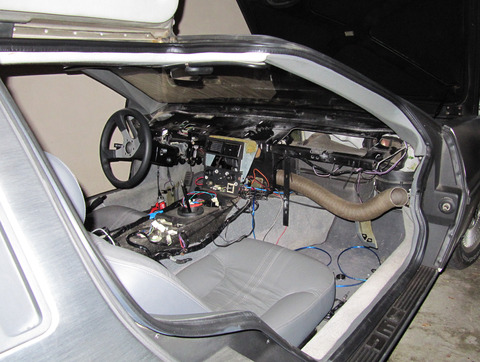
I added the instrument connector double-recepticle to the CAD models page.
2020 May 25
The presentation I gave in Oct 2019 at DeLorean Weekend is up on youtube now
2019 May 4
I've added a new section to te website: CAD models. I published the dashboard vent, and plan to publish any other parts of the car that I feel I've made an accurate model of.
This is also my first big experiment with WebGL and THREE.js, which can give you an in-browser preview of the files, if your browser supports it.
2019 Feb 08
I've now also finished VideoLAN::LibVLC. Well, maybe "finished" is too strong of a word, but it plays video now, rendering to OpenGL textures from a new and improved OpenGL::Sandbox, which now also supports modern Shader-based OpenGL.
2019 Jan 09
I finished a major rewrite of my OpenGL modules, and published them as OpenGL::Sandbox.
2018 Jun 18
I gave a presentation at TPC-NA on the implementation of the graphics of the dashboard. You can view the slides here, or the whole 50-minute video here.
The presentation showcased some of the code from the graphics, which I've now got mostly packaged up into the module OpenGL::Sandbox.
2018 Apr 1
I finally published my long-belated OpenGL bindings for Bash, and wrote a companion article about it. This isn't directly related to the car software, but I used it for a lot of my OpenGL testing and learning back in college.
Follow the discussion on
- Slashdot
- Reddit r/programming (and r/linux, and r/bash)
2018 Jan 22
I wrote an article for OpenSource.com to tell my story of switching to Perl. It's a bit easier to consume than my hour-long YAPC talk from 2015. I had a lot of material I wanted to add though, so I made a second article from the leftovers about the Merits of Perl 5 from a systems programming perspective. Makes me want to go drive it now. Except I'm in New Hampshire and the snow and salt probably aren't leaving til April :-(
2017 Jun 20
I Brought the DeLorean to the 2017 annual YAPC::NA conference for "show and tell", this year in Washington DC at the US Patent and Trademark Office. No I don't have any patents on the car. Yes it was a hit with the perl folks :-)
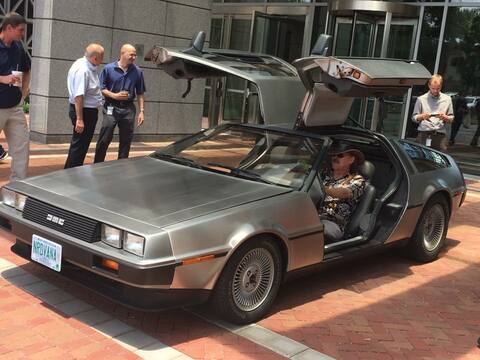
The drive down and back from new Hampshire was pretty horrible thanks to both NYC and DC traffic and some really hot weather, but I'm still glad I did it. Life would be boring without an occasional adventure.
However, now I have a mystery to solve. An hour from home on the return trip my oil pressure dropped off, and indeed the oil level was at the bottom mark (hooray for gauges with changing colors). (Also hooray for an understanding girlfriend who came to rescue me at 4am)
After I got home I determined that I'd lost about a quart and a half, since I'd topped it off before I left, but there are no significant leaks anywhere. The oil level hasn't changed at all since. So, either the engine burns a tiny little bit of oil that adds up over 1000 miles, or some event or temperature causes it to leak quickly and seal back up later. Incidentally, the tiny leak around the transmission completely stopped while I was in DC and there wasn't a drop at all in the parking lot.
2017 Jun 18
The steering wheel now has buttons and twin thumb joysticks! Pictures forthcoming.
2017 Mar 05
I'm attempting to get more of my project's code released as Perl modules. I've released semi-finished versions of the new X11::Xlib, and X11::GLX.
Coming up next is VideoLAN::LibVLC !2016 Oct 13
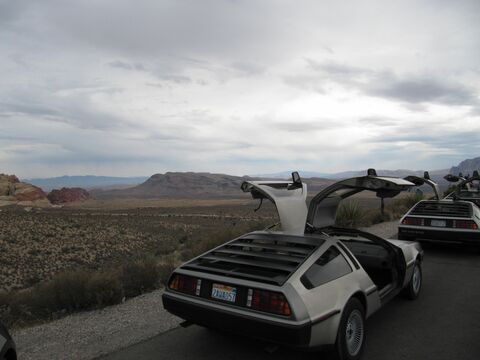
Las Vegas was a bit too far to drive, but Jenn and I flew in for DeLorean Weekend. I gave another talk on my dashboard project (might get a video for that here eventually) and had a great time exploring Vegas and touring Nevada.
SpamAssassin hasn't been cutting it for me lately, so I just want to give a quick thanks to MX GuardDog, who offers a really inexpensive MX spam blocker service for people like me who run their own personal email server. And, by adding a brief ad like this to your page, they give you the service for free!
2015 Sep 13
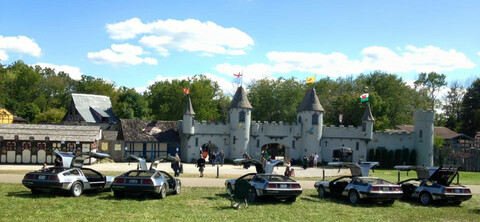
Visited the Ohio Renaissance Festival for Time Traveler's weekend, with the Ohio DeLorean club.
2015 Jun 09
I presented the project at YAPC::NA this year!
You can watch the video on the presentations page. (warning, its an hour long)
2015 May 19
Found a write-up of our event at the The Proto Buildbar.
2015 May 16
Fit and Finish; Dayton Proto BuildBar
Wires to the rear of the car are now routed under the carpet, and I wire-tied things into place so that the computer install is nice and tidy. I also have a new GPS status icon that indicates presence of hardware, satellites, and whether it has a fix.
...just in time to go to the Dayton Proto BuildBar with the Ohio DeLorean Club! This place is a neat cross between a maker space and a small café. They have a selection of 3D printers, soldering stations, tools for hourly rent, and a bunch of pre-printed trinkets for sale. I wish I'd grown up near a place like this...
They invited the club up and we did a little car show in their parking lot.
2015 May 11
GPS Integration
The GPS integration has been coming along well. The gpsd service for Linux is remarkably easy to use and configure. I have it set up to run without any devices connected, and then I use a hotplug script to tell it about newly detected devices, which it then opens and automatically determines their protocol and capabilities. Reading the data from gpsd is as easy as reading a packet and decoding JSON.
Mapping software is going to be a BIG challenge, but in the mean time I have coordinates, and since GPS operates by each satellite broadcasting a GMT time, I get my time synchronized to sub-second precision for free! (well, not "Free", but it only took 5 lines of perl to set the system clock from the GPS feed. ntpd can also do this but I'd rather use my 5 lines of perl than run ntpd)
2015 Apr 12
Instrument Cluster Connector Version 2
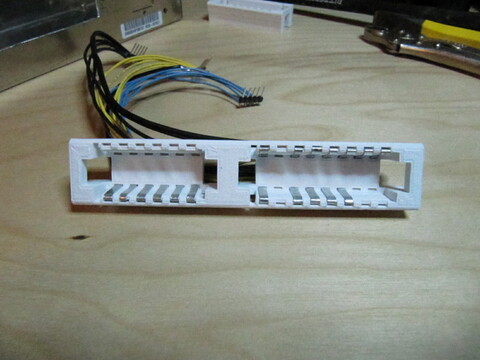
I've completed a new version of my adapter for the instrument cluster connector. It makes more solid contact, and also attaches to the side of the microcontroller's metal container so things won't shake loose anymore.
2015 Mar 14
Project Milestone!
I've finally assembled all the pieces of the digital instrument cluster, and have live tach readings as I rev the engine! I finished the microcontroller code and updated the embedded linux image early Saturday morning, but then decided to play it safe and just drive the stock dash for the parade, so that I could get a little sleep. Then at Ken's after-party I had a "first live test" event, which was mostly successful. I got the few bugs fixed pretty quickly when I got home.
On the flip side I've had to use a lot of time off from work this past week, and now I have a lot of catching up to do :-( Thanks to Henry for understanding!
2015 Feb 27
After multiple years of "I'll get around to that soon" the site is now up! I've been collecting pictures and writing notes since I started, but didn't get around to publishing them until now. I'll be retro-actively adding content over the next few weeks as I find time. Posts before this one are just notable events in the timeline of the project.
2014 Oct 09
Put the finishing touches on the instrument cluster graphics.
All interface widgets complete!
2014 Jul 23
Replacing the monitor for the instrument cluster will be hard. A few years ago, there was no shortage of monitors all built around the same 18.5" panel. Now however, there aren't so many to choose from, and I can't find a single one powered by 12V. They all have 120V direct to the back of the monitor. I found a Chineese website selling the exact board I need, and ordered one, but it will be several weeks before I get to test that.
I also bought a Lenovo laptop with 16" screen which could become the new computer+monitor. It was only $270 on outlet.lenovo.com, and came with DOS and a russian keyboard. Only downside is the screen is 2 inches smaller than the previous monitor. It will look ok in the enclosure, but I'll keep this as a backup plan if I can.
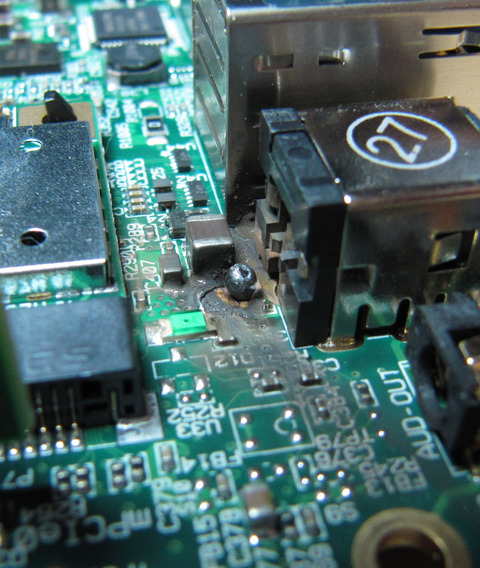 So, with nothing else to lose, I disassembled the FitPC and the monitor to see if I could
repair them. I found some thoroughly toasted components, which were so badly fried I couldn't
even identify them.
FitPC tech support informed me that a new motherboard is pretty much the same price as a new FitPC, but then they surprised me by giving me the part numbers for the ferrite bead I fried! As it turns out, the current I smacked it with exploded the ferrite bead before doing any real damage to the rest of the board. Since the ferrite bead is really just for noise suppression, I tried soldering a wire accross it and it booted up!
Looking at the monitor, it turned out to be the same deal. Scraping away the char revealed the markings "FB3" and "FB4". I soldered wires accross the gaps and the monitor came back to life! So, near miss, but now I have both my computer and monitor back.
2014 Jun 14
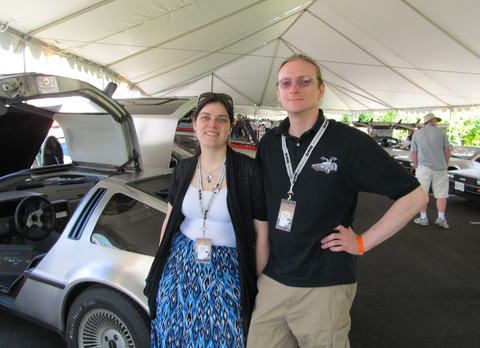 The whirlwind of DeLorean Car Show 2014 has
come to a close. It was quite an event!
I put up a good fight to get the dash together in time. I got all the computer-side software done, though the microcontroller is going to need a lot more work, and AVR code is really difficult to debug when the part that is breaking is the communications with the host. I missed the Friday night events while trying to get the pieces together, and finally called it quits at 3am with enough of it assembled and working to make a decent exhibit. I then assembled my presentation slides until 7am.
The electrical work was one of the things I didn't finish, and instead of packaging everything into place under the dashboard and wiring it to the car I just got the computer semi-mounted into place and then figured I'd run it off the 12V wall adapter I'd been testing with. I have my DC-to-DC power supply for connecting it to the car, but had forgotten which jumper settings and pins to use, and didn't have time to look it up and connect the wires.
Unfortunately, when we got there I discovered it was all outdoors in the parking lot with no wall outlets in sight. Since the computer and monitor both run off 12V and the car has a nice clean ~13V when not running, I decided to just try plugging them directly into the battery. Sadly, lack of sleep compounded with eagerness to show it off led to a fatal mistake of wiring up the battery backward, and I let the magic smoke out of both the computer and monitor. But, while I didn't get to show anyone the dash in its installed configuration, I did have my laptop running the same demo-mode that I was going to run on the dash, and people could see it easier anyway. So I did get to do some show-and-tell about the project.
For my presentation on the project, Ken set me up in the evening event room half an hour before dinner, and I gave my talk about the project to the gathering dinner crowd. The talk went well (especially for being assembled in 4 hours) and was pretty well received.
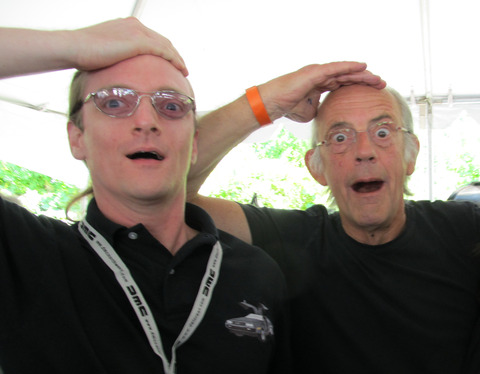 Aside from my wiring disaster and showing off the project, there was also quite a show
going on. I got to meet Christopher Lloyd and do a "great scott" pose with him, and the other
Back to the Future crew was there again, 159 DeLoreans showed up, I got to chat
with the other owners and some fellow inventors, the vendors were all there with the upgrades
and replacement parts, the DeLorean "museum" was on display, and Jenn and I had a pretty good
time all around.
2014 May 15
Began converting instrument cluster graphics to Perl. Writing everything in C just takes too long.
2012 Jul 21
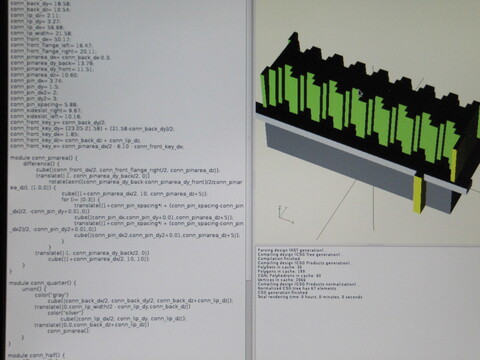
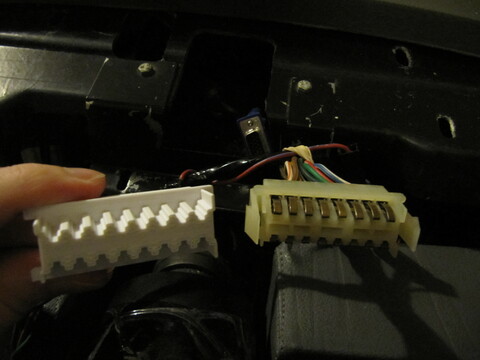
Continuing the saga of the mystery connector on the back of the instrument cluster, the one I made from epoxy putty has a crack in it and is barely staying connected. I did a more thorough internet search, and emailed a dozen european auto parts places and nobody has ever seen the instrument cluster connector. (or, they claim its a molex connector when it clearly isn't) So, I got out my calipers and took a bunch of measurements and learned enough OpenSCAD to draw it up!
I had to rearrange the thicknesses a bit to get it to print cleanly, so I don't have a true replica, but if I can find some spring-contacts to mount in it I should be able to make it work.
The 3D printer does an awesome job of producing things to scale! It is accurate to better than a millimeter in the horizontal plane. Now if only I could say the same for the Z coordinate... (larger pieces tend to warp, and lift off the build plate at the corners, and then the vertical resolution gets messed up)
2012 Jul 5
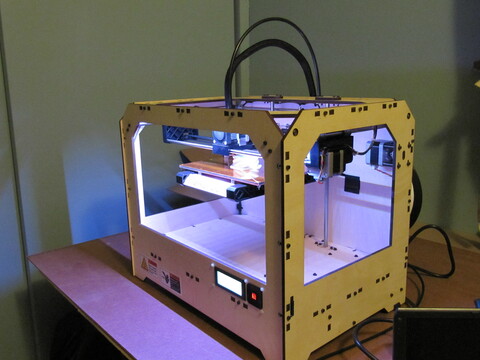
So I bit the bullet and bought a 3D printer. Got a MakerBot on the recommendation of Ryan Brandys. Hopefully I'll be able to prototype things for the car a little faster now. The next challenge is to acquire and learn how to use some CAD software...
2012 Mar 26
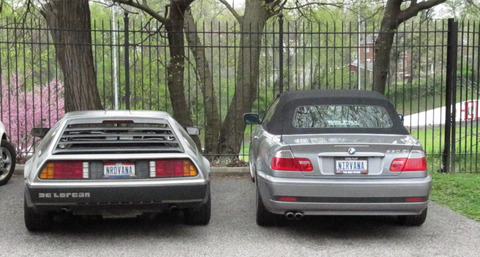
In a crazy violation of probability, I discovered that one of the guys I contra-dance with owns the Ohio "NIRVANA" license plate!! I asked around for a few weeks until I found out who it was, and then this weekend we were both at the Pigtown Fling with our cars, and I got us together for a picture!
2011 Apr 16
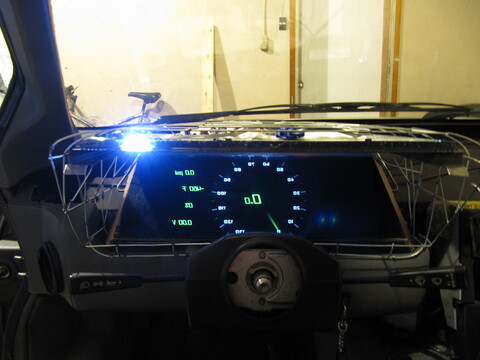
I've been working on some binnacle designs, making them out of spot-welded galvanized steel wire. I really like this as a design medium, aside from all the cuts I'm getting from the sharp wire ends. You can get the spot welder from Harbor Freight for about $200, and a spool of galvanized wire is $10 at wal-mart.
The spot welder melts through the galvanized wire in a split second. So basically I just line up the wires in the jaws and give the switch a little tap and the wires are joined.
Here's my first creation:
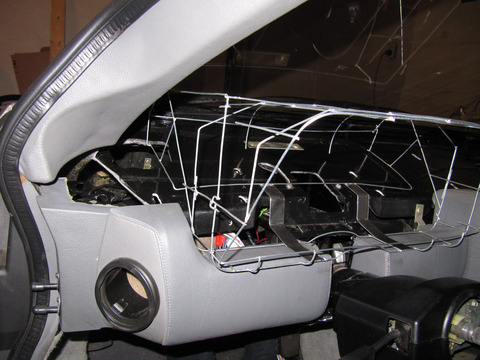
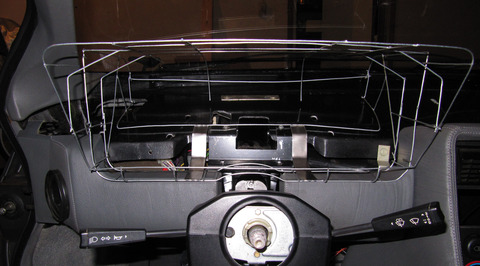
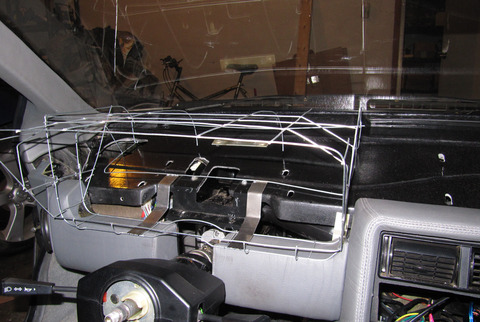
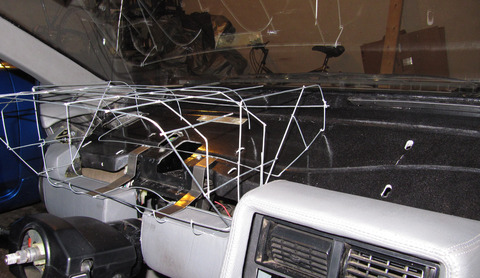
And a more polished revision:
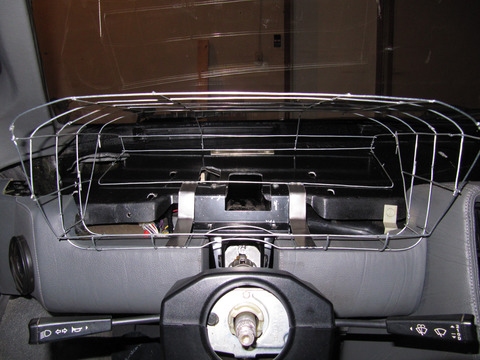
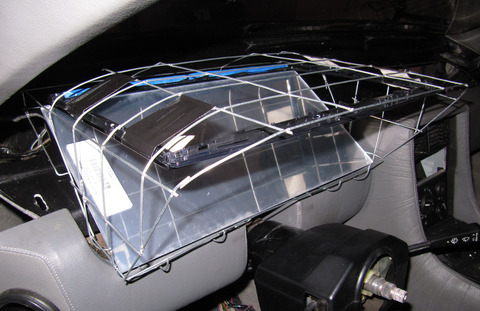
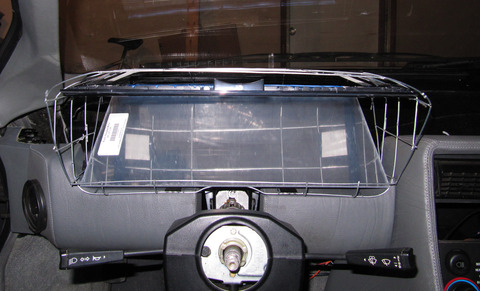
And finally, connected to the computer, rendering gauges!
2010 Mar 16
Well, I have a microcontroller connected via USB! I used the Teensy example code to set up my microcontroller as a generic USB HID device, gave it a custom USB device ID, and wrote a udev rule for Linux to make it show up as /dev/delorean ! Though now I can't get libusb to open my custom device path... it wants to enumerate all the USB devices by their default names. hm....
